Travel day started off well. Everyone was in good spirits, well prepared for our 9-ish hour journey. Things went well until just after Canyonville, Oregon deep in the mountains. 5 of the 8 bolts securing the axel to the hub sheered off and 3 of them backed all the way out. This caused the engine to over-rev and exploded one of our radiator hoses.
The 2nd day also started well and degraded with bad news. I personally was a bit of a dick and slept in a bit, but the rest of the team went to the track to get “a good spot”. We spent the first half of the day getting ready for tech.
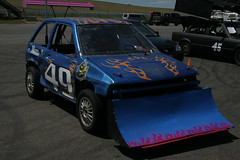
We finally headed over to tech at 1pm, only to fail for a transmission leak that made itself evident when the car was jacked up on the passenger side and because our front wing (Pike’s Peak style) was “too sturdy”. We begrudgingly took off our lip, made a trip to the hardware store for a bolt, cut the bolt down to size, and riveted on some ABS plastic to make an air dam. Then with 30 minutes to spare, we took it over to tech and passed.
I got 4th (out of 10) at NWR-SCCA Event #2, which was good for my first ever NWR-SCCA event trophy! It was a pretty sweet trophy too.
Finally, my 2nd 24 Hours of LeMons team and I are heading down to Williows, CA tomorrow for the race this weekend. Technical inspection is Friday and the race is Sat/Sun. We’ll be driving the super-pimp Grouppe Festiva.
My work buddy, Craig, recovered my friend Corey’s keys that he lost a year ago down our black-hole stair case at work; but we didn’t let him know we had the keys. So, over the past few weeks before we went to lunch (Corey usually drives us all), I would go out and mess with his car just a little and then watched as he slowly started to think he was crazy.
One day, I moved it just slightly into the next spot, then before we got into it for lunch, we mocked his parking job. This prompted a response of “Hrmmm, I didn’t think I parked on the line.” Then one time I cranked his stereo up and moved his seat forward a few inches. It was super hard not to laugh as he was verbally confused about his new seating position.
Finally, today, he was parked where I normally parked. We switched his car back to where he normally parks and put my car back where it’s supposed to go. We also moved his seat all the way forward. His reaction was too hilarious, preventing us from containing our laughter in response to his “I think someone has been driving my car!” and “I swear I didn’t park there”, so I decided to finally give him his keys back. Good fun though.
The first slush event of the year, “Totally Stoked”, was today at Sanderson Field. I was able to convince my brother to come out with me as a tire warmer, his 2nd autocross ever and his first one was 3 years ago.
I rode with Robby for all 4 of his runs, coaching down his times each run (for the most part). He ended up getting 1st in his class. I ended up pulling out a great 4th run and getting 3rd in ST1, bumping myself into the trophies.
During tech, I also found out that I trophied in ST1 last year, so I was awarded a pretty cool Ogio waterproof duffle bag with a custom inscription.
In honor the occasion, I decided to spend a little time to add the WWSCC Slush series results to the alpha AXED site.
This is the 2nd time I’ve found Stig hiding around the world on Google Maps. I thought I’d share it for any one who gets a kick out of this type of thing.
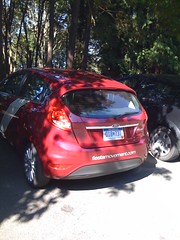
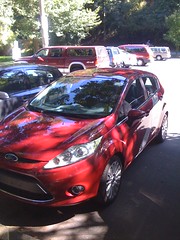
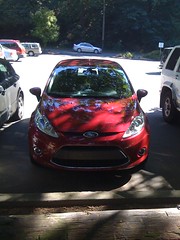
Because I’ve been planning on rearranging our car situation, I’ve been car shopping. I decided I want to get a car that’s seriously competitive in autocross and noticed, while I haven’t been driving very well, the cars I’ve picked thus far just aren’t competitive and simply aren’t used in competition. I grabbed the 2009 Solo results and tried to figure out what cars showed up, which ones won, and why.
I’m not going to provide much analysis, but below is the data for anyone else who wants it. I will say this though, for any class that offers a car with a double wishbone front suspension, you basically eliminate the cars with MacPherson struts from being competitive. Even cars with more torque and better power to weight ratios seem to be out-classed in autocross. The one exception to this seems to be the Chevrolet Cobalt in D Stock, which is touted for it’s excellent stock suspension (and one of the trophies was grabbed up by the very talented Kevin Dietz).
Currently I’m leaning towards the RX8. I like the car’s styling, suicide rear doors, and suspension. However, I’m having a lot of trouble getting behind the rotary engine, which offers a fairly awful power / MPG ratio, all while remaining pretty torqueless. All the other reasonably priced cars in A-D Stock seem be convertibles, which are definitely not my thing.
Tuesday and Wednesday I was at the Evolution Performance Driving School in Packwood, WA. I’ve been waiting a long time to take that school (almost 2 years) and it was totally worth it. I strongly recommend it for anyone interested in getting better at autocross.
The school was nothing like what I thought it would be in terms of what you learned. At autocross, you hear people talking all the time about “looking ahead”. During your runs, you’d try and “look ahead” and might not get any faster. This school totally taught me what looking ahead really means and showed me a lot of tools to make sure you’re looking ahead.
I was also nice to be able to ride with some national champions so they could show you what your car is capable of doing. My scoring results sheet showed a huge improvement after one ride with Karl Coleman driving my car through the slalom.
I’ve moved the stable beta version of AutoX Event Data (AXED) to http://axed.danpodhola.com. I’ve done this so my development alpha site’s intermitten downtime doesn’t stop people from using it while I add new software features and updates. If you want to see the latest and greatest, the old URL still works but reliability will be low. I’m in the process of adding another organizations autocross data (WWSCC) to the site, so if you tried to use it all this weekend, it could have been all-kinds of screwed up.
 The 2nd day also started well and degraded with bad news. I personally was a bit of a dick and slept in a bit, but the rest of the team went to the track to get “a good spot”. We spent the first half of the day getting ready for tech.